Family Dashboard
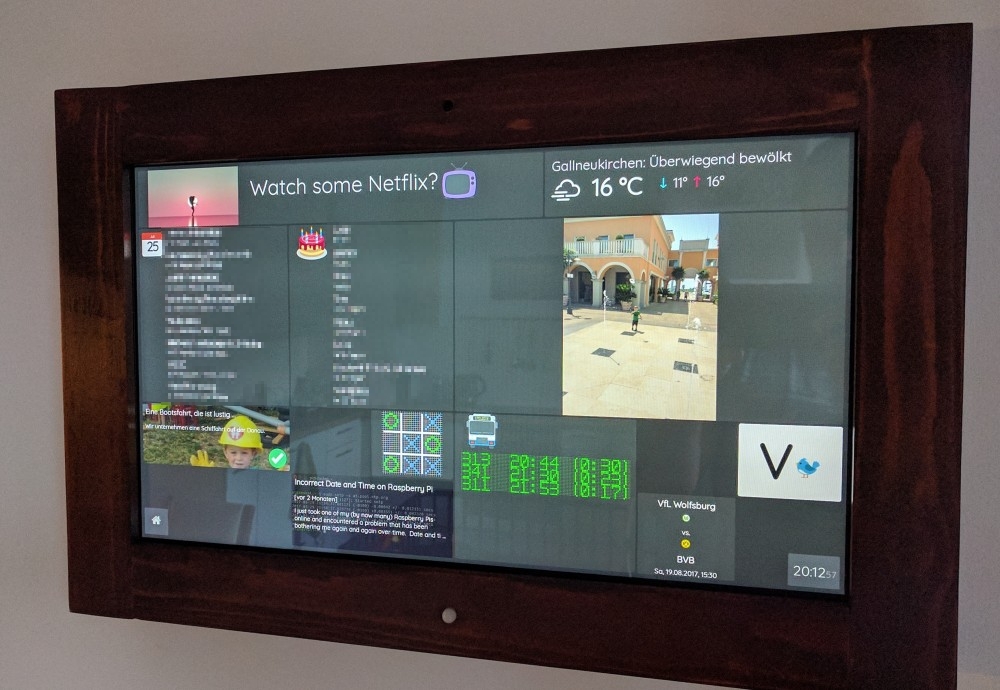
July 25, 2017Since we moved apartments recently, I figured that this would be a good time to upgrade our existing Family Dashboard which was basically a RaspberryPi with the official 7" display sitting on a kitchen shelf. It had served its purpose quite well, displaying e.g. the current weather, bus times, upcoming calendar appointments and some personalized messages. Can you tell I built it using JavaScript (NodeJS and a web browser in Kiosk mode) from the next image ;-) ?
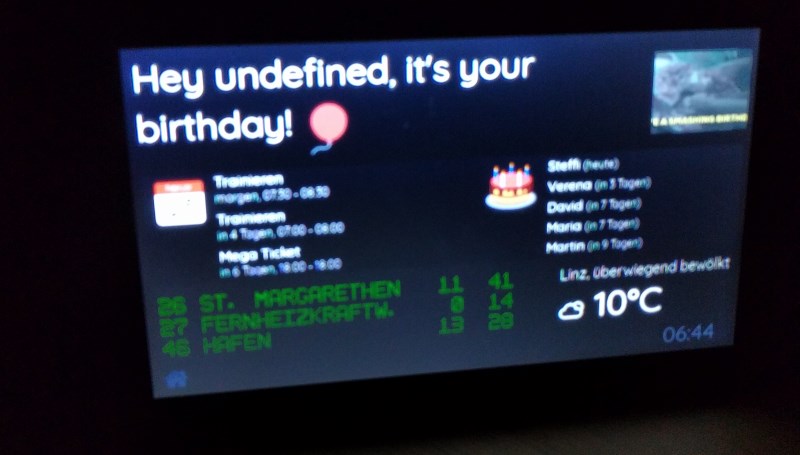
Anyway, the 7" 800x400 pixel display was a bit limiting and I decided this project needed an upgrade.
The Parts
- Acer T232 23" Touchscreen: I had bought this monitor a couple of years ago when I was doing a lot of mobile development. The touchscreen capabilities had come in quite handy for testing back then. But meanwhile, I had nearly forgotten about the touch features and decided that this monitor needed a new purpose.
- A RaspberryPi 3 to drive the display.
- Raspberry Pi Spy Camera: This piece of hardware would allow me to also use the dashboard installation as a kind of selfie station. I preferred this tiny camera to the official Raspberry Pi Camera Module model because of its compact form factor that would allow me to hide it in the dashboard's frame.
- A PIR motion sensor would allow me to turn the display off if nobody was in the room. I also went for a small form factor here to be able to integrate it nicely into the frame.
The Woodwork
I am not a very handy person and this is an area where I am really way out of my depth, but for some reason I felt that I wanted to assemble the wooden frame by myself.
So I started with some some sketches and calculations, ...
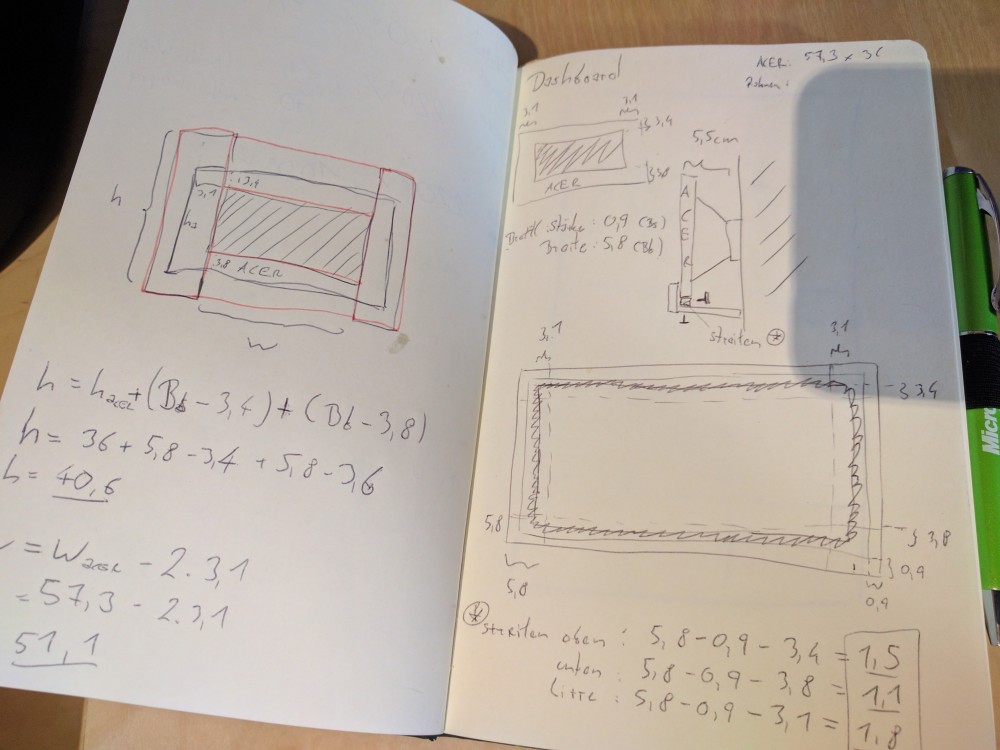
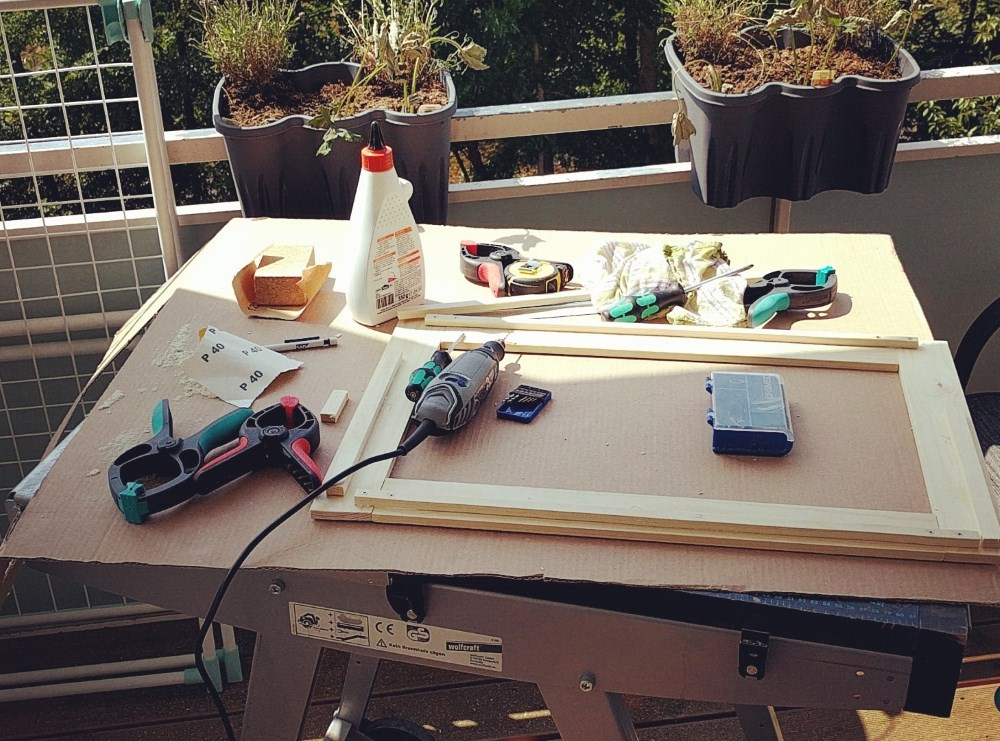
... went into the hardware store, gave it a try ... and enjoyed the hell out it!
The physical reward you get when building something actually tangible is priceless.
I gave the frame a good staining and finished with clear varnish.
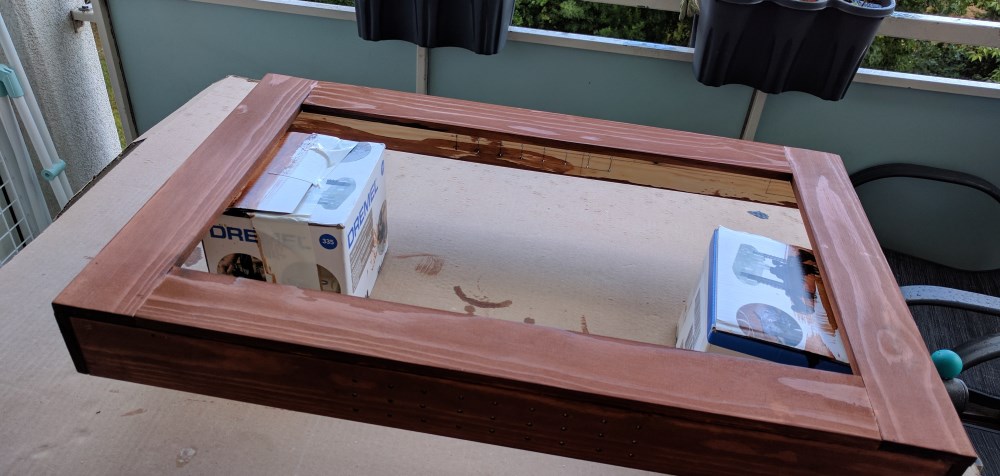
Then it was time to put the pieces together. The monitor is held in place by wooden brackets and the electronic parts and cables are mostly attached using duct tape.
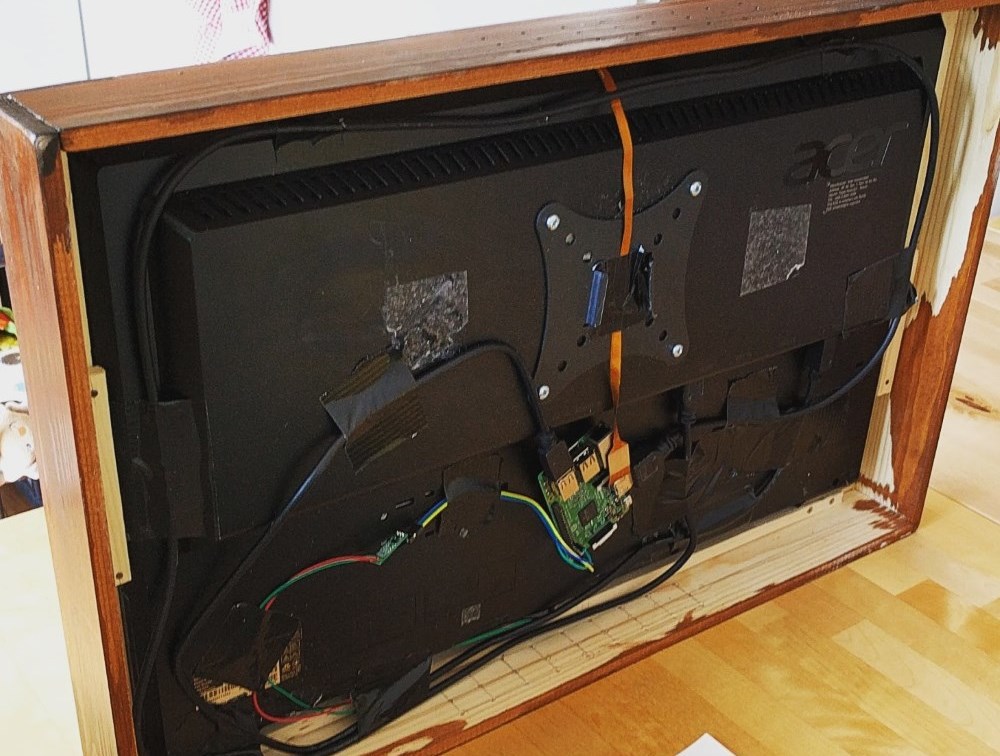
The only thing left now was wall-mounting the frame using a VESA monitor bracket (which you can see on the picture above). Also I concealed all the wiring in the wall to give the whole installation a nice and polished overall look.
The Software
This could have been really easy, had I just reused the software written for the existing dashboard. But I wasn't too happy with some of its aspects and also considered it a good opportunity to finally do an actual React project and get hands on with this technology. Something I had planned to do for quite a while now.
So I started the dashydash project (Dashy McDashboardface felt slightly too long for a project name) and implemented a new dashboard software based on a NodeJS server and a Rect browser client. My goal was to have a set of components (e.g. weather, calendar, bus schedule, ...) that could be put on the dashboard on arbitrary positions to allow for different layouts.
React was by its nature very well suited for breaking down the functionality into different modules and the positioning of them turned out to be really easy using the CSS Grid Layout.
Note: At the time of writing this blog post, the Chromium browser on the RaspberryPi does not support CSS Grid out of the box. You have to enable Experimental Web Platform features (navigate to chrome://flags/#enable-experimental-web-platform-features) for that.
The Modules
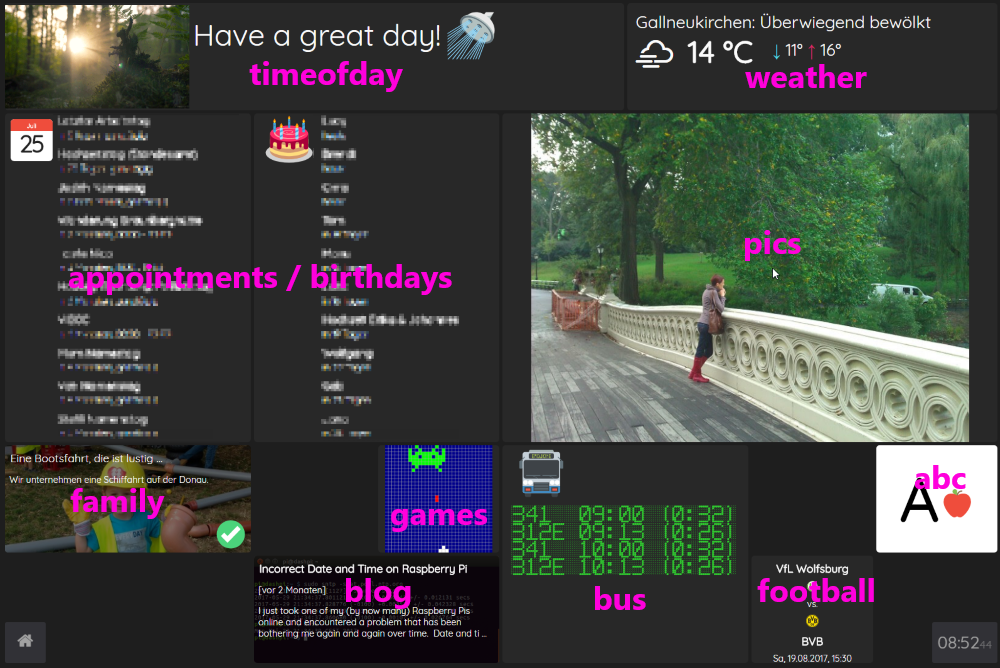
Now these are some of the mentioned modules displayed on our dashboard.
abc
This lets my 4 year old learn the alphabet in a playful way. It displays capital letters and images of things starting with this letter.
appointments / birthdays
Displays a list of upcoming appointments or birthdays fetched from Google calendars using the npm ical package.
blog
This module displays the title, a short description and the date of my latest blog post. It acts as a subtle reminder to come up with a new post should I let too much time pass without one.
bus
The bus schedule from home to work. Very useful.
family
A couple of years ago I built this website. It acts as a little helper tool for planning our family activities. This module reminds us of the currently planned activity.
football
Displays time and venue of the upcoming game of my favorite football team Borussia Dortmund.
games
These are a couple of 32x32 pixel animations reminding of retro computer games. I actually built this as a testing environment for another project but considered it way too nice to be kept in hiding.
movies
This component has no actual visual representation. It only runs on the server side and periodically checks my regular movie theater for new OV movies. If a new OV version of a movie is released, I get a mobile phone notification using IFTTT. Nifty.
news
This one cycles through a list of news head lines and pictures taken from newsapi.org.
pics
This is my favorite module by far. It looks for a special album in my Google photos collectionb and displays its pictures. That way, I only have to add my favorite new photos to this album and I automatically seen them on the dashboard. Awesome!
weather
Using data from openweathermap.org, this module displays weather information for a given location.
Arranging these modules is now simply a matter of editing a JSON configuration file. The layout in the picture above e.g. is configured like this (the numbers between the square brackets represent top / left / width / height position in a 8 x 6 grid.
"main" : {
  "modules" : {
    "timeofday" :    [ 1, 1, 5, 1 ],
    "appointments" : [ 1, 2, 2, 3 ],
    "birthdays" :    [ 3, 2, 2, 3 ],
    "pics" :         [ 5, 2, 4, 3 ],
    "games" :        [ 4, 5, 1, 1 ],
    "family" :       [ 1, 5, 2, 1 ],
    "blog" :         [ 3, 6, 2, 1 ],
    "weather" :      [ 6, 1, 3, 1 ],
    "bus" :          [ 5, 5, 2, 2 ],
    "abc" :          [ 8, 5, 1, 1 ],
    "football" :     [ 7, 6, 1, 1 ]
  }
}
So, displaying a component (e.g. pictures) full screen can be done like this:
"photos" : {
  "modules" : {
    "pics" : [ 1, 1, 8, 6 ]
  }
}
Switching between these layouts ("boards") happens automatically after a certain amount of time or - of course - manually.
Engage!
I am still constantly working on this thing, tweaking it or coming up with new ideas for modules. Since the software can be found on GitHub, I would be very happy if someone contributed to this project or added their own modules. I think that this is clearly something that every techy kind of person would like to have in their home, right?