A DIY Remote-Controlled LED Pixel Frame
March 21, 2024I don't how often I had stumbled over the Divoom Pixel Frame (or a similar product) in the past and was close to buying it. Each time however I thought "I can build this myself", didn't buy it but also didn't build it. Until ... last week, when I finally invested a couple of hours and actually made this thing.
![]()
The Hardware
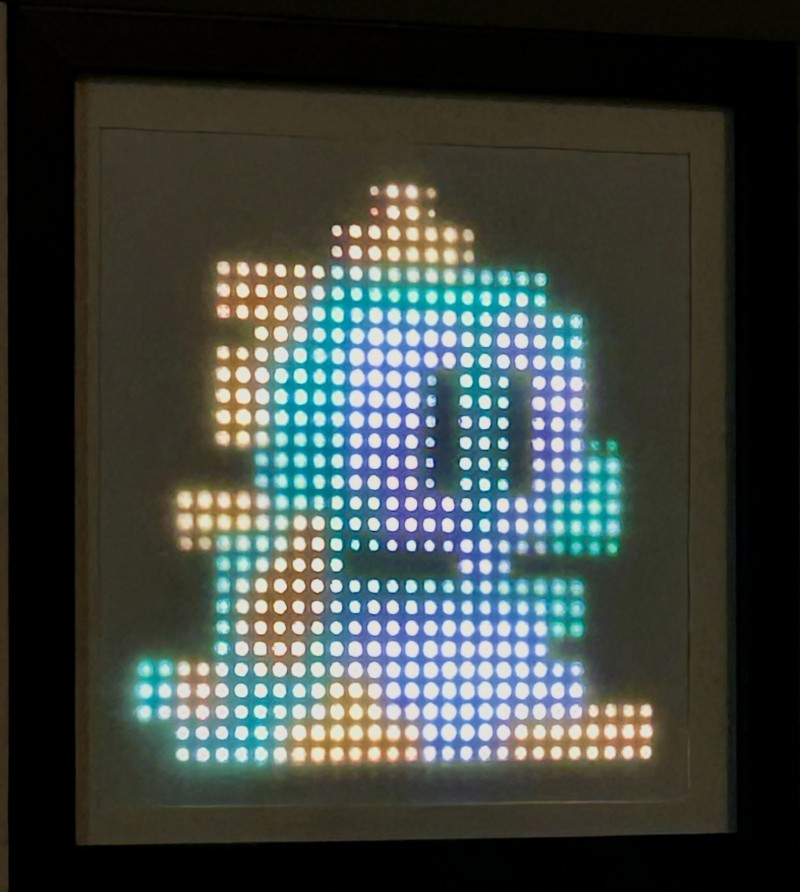
- From a previous project I still had this 32x32 RGB LED Matrix by Adafruit which would serve as the remote controlled pixel frame now.
- Since I had just recently bought a Raspberry Pi Pico W, I decided to use this as the driver for the project. I couldn't just use the Arduino again (like in the previous project) since I needed networking capabilities this time.
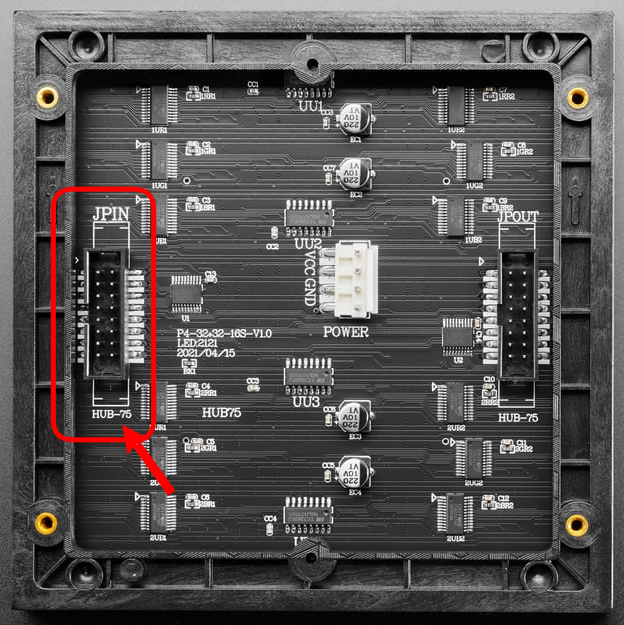
I remembered that the LED Matrix was driven by a protocol called HUB-75 and the respective ribbon cable connector on the back of the LED matrix is even labelled like that.
A web search for "Raspberry Pi Pico HUB75" turned up the PicoPythonHub75 GitHub project which had exactly the information I was looking for.
Wiring up the Raspberry Pi Pico and the LED Matrix
The project's README contained this very useful wiring diagram that I just copied here.
This is the pin-out of the HUB-75 connector:
    /-----\
R0  | o o | G0
B0  | o o | GND
R1  | o o | G1
B1  \ o o | E
A   / o o | B
C   | o o | D
CLK | o o | STB
OEn | o o | GND
    \-----/
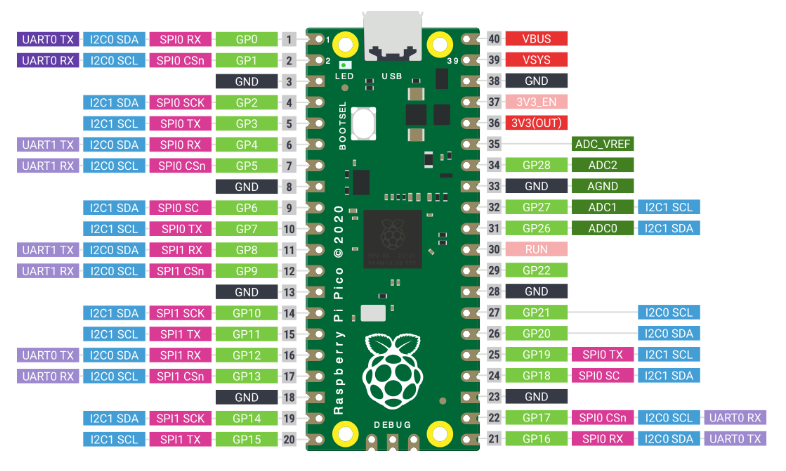
And here is how to connect these pins to the Raspberry Pi:
R0 - GPIO0
G0 - GPIO1
B0 - GPIO2
R1 - GPIO3
G1 - GPIO4
B1 - GPIO5

A - GPIO6
B - GPIO7
C - GPIO8
D - GPIO9
E - GPIO10

STB - GPIO12
OEn - GPIO13
CLK - GPIO16
Having the Raspberry Pi Pico pin-out at hand turned out to be quite handy as well.
After assembling and testing this successfully using a breadboard and jumper wires, I soldered everything onto a circuit board.
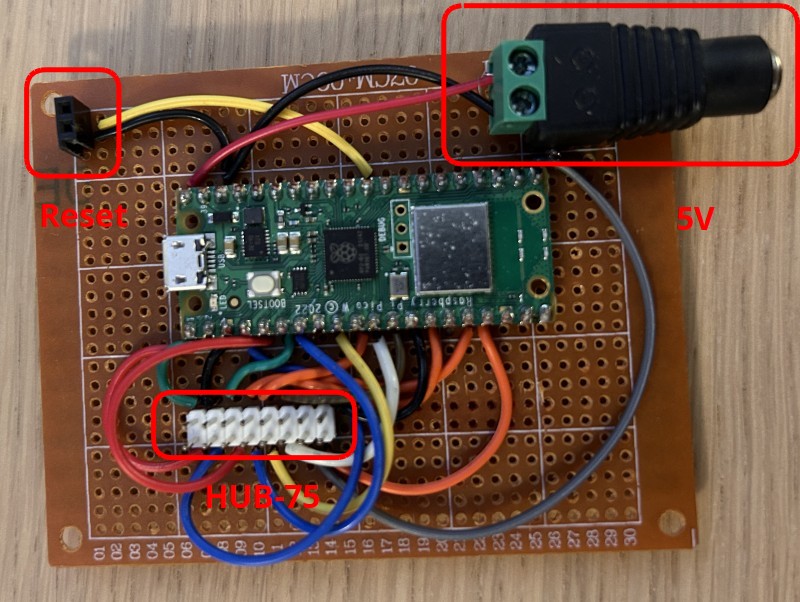
I know - still quite the bunch of wires but at least I have a proper connector for the ribbon cable now. I also added a connector for a reset push button and the power jack.
The Software
The Matrix Server
This part would run on the Raspberry Pi and be responsible for receiving commands over the network and displaying the pixels accordingly.
I decided that I wanted to use CircuitPython for this project which turned out to be a real straight-forward way to drive this LED matrix.
With only a couple of lines of code I was able to address every single "pixel" of this LED matrix. Or - as in the sample below - fill the whole screen red.
import board
import rgbmatrix

MATRIX_DIM = 32

# Create an instance of the RGBMatrix object
matrix = rgbmatrix.RGBMatrix(
    width=MATRIX_DIM, height=MATRIX_DIM, bit_depth=6,
    rgb_pins=[board.GP0, board.GP1, board.GP2, board.GP3, board.GP4, board.GP5],
    addr_pins=[board.GP6, board.GP7, board.GP8, board.GP9],
    clock_pin=board.GP16, latch_pin=board.GP12, output_enable_pin=board.GP13)
framebuffer = memoryview(matrix)

def fill(col):
    for x in range(MATRIX_DIM):
        for y in range(MATRIX_DIM):
            # Convert the RGB color to RGB565 format (16-bit)
            color565 = (col[0] & 0xF8) << 8 | (col[1] & 0xFC) << 3 | col[2] >> 3
            framebuffer[y * MATRIX_DIM + x] = color565
    matrix.refresh()

fill((255, 0, 0)) #red
Now I "only" needed to add some networking code to receive the pixel data and this part would be ready. I used adafruit_httpserver for that, which again made things really easy and this was finished way sooner than expected.
You can find the whole code in the LedMatrix2 GitHub project.
The Matrix Client
What was missing now was an application that would transfer the actual pixel data to the Matrix Server running on the Raspberry Pi.
I created a small ASP.NET MVC application for that, which allows me to choose from a couple of predefined 32x32 images to send to the display.
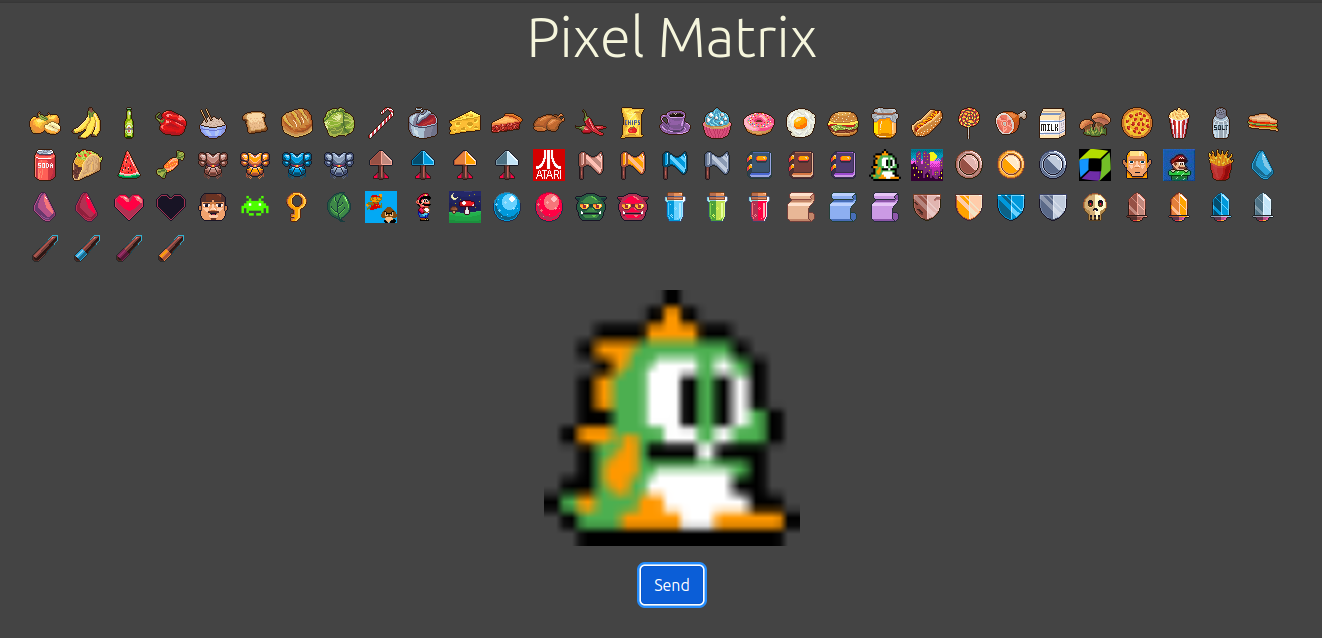
It's nothing fancy yet, but works perfectly as a proof of concept.
Of course this application could use a couple of more features like e.g.:
- Grouping or tagging the icons (e.g.
emoji,food, ....). - Image upload (and conversion) functionality. Currently you have to manually add 32x32 images to the
wwwrootfolder. - "Auto-send" mode in which the images are periodically and randomly sent to the matrix.
- An editor mode in which custom pixel artwork can be created.
- Dynamically generated images:
- A clock (analog, digital, ...).
- A calendar.
- A weather widget.
- Or a stock ticker.
- ...
- Animations would be awesome. This requires changes to the Python LED Matrix server as well, though.
- ...
That being said, the LedMatrix2 is open-source and I am happy about contributions 😃.