Moving this Blog to my Synology NAS
February 14, 2024TL;DR
This blog is now running in a container on my synology NAS. The tool chain that made this possible involves GitHub actions, the c8n.io container registry and a Cloudflare tunnel.
This blog had been running on a Linode Linux VM for a very long time now. With costs of around 5€ per month and 0 downtime so far, there was no actual reason to change that. However, I was just curious how easy it would be to move this site onto my local Synology NAS.
As it turned out, it wasn't that hard and the site is running successfully for more than two months now on my own premises. So I decided to keep it that way and document my migration steps in this blog post.
Dockerize this Blog
In retrospect, I think what initially gave me this idea was this blog post that followed the .NET 8 release regarding minimal (aka "chiseled") containers.
I hadn't bothered "containerizing" this website/blog until then as it just wasn't a requirement for me. Those new trimmed-down containers seemed interesting though and I wanted to give them a try.
So I used the mcr.microsoft.com/dotnet/aspnet:8.0-jammy-chiseled image as a base and within a couple of minutes
I had my blog running in a container that was about 350 MB total size (as apposed to ~900 MB with the regular image).
That really kindled my interest. So I took the next step.
Publish the Docker Image
I have this website and all its data (including the blog posts) in a private GitHub repository.
This means that each push to this repository is supposed to create and publish a new Docker image.
This is easily done with a simple GitHub Action that runs the required docker build|tag|push...
commands.
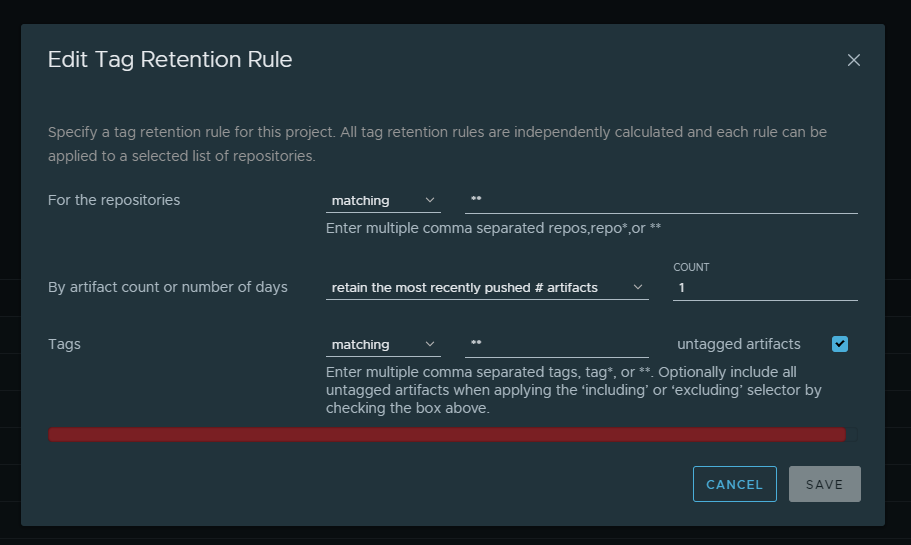
As a registry for this image I used c8n.io as they allow you multiple private projects as long as you don't exceed a quota of 1 GB, which is sufficient for my use case.
I made sure though to add a Rentention Rule (in the Policy section) which runs hourly and only keeps the latest version of the image around. Otherwise, the images pile up and you hit that quota pretty soon.
So the publishing step was crossed off the list as well.
Run on Synology
I was already running a bunch of Docker images on my Synology NAS, so adding another one was a task of seconds.
On that account, I really have to recommend running Portainer. For the most part, managing your containers with it is much more pleasant and efficient than using the built-in tooling from Synology.
The performance of this website running in a Docker container on my NAS seemed fine enough. So the next step was automatic deployment, since I did not want to update my container manually each time.
Automatic updates
Luckily, the answer to automated container updates was yet another Docker container - watchtower does exactly that! Based on the configuration it regularly checks one, many or all of your containers for available updates. It also works with private repositories as long as you configure it correctly.
So I was almost at my goal. A push to GitHub would result in an automatically published container, which in turn would automatically be deployed to my NAS.
The last puzzle piece missing was making this website that's running on my NAS publicly available.
Cloudflare Tunnel
This last remaining problem was again easily solved by stepping on the shoulders of giants. Instead of messing around with DynDNS services (which was my first instinct), I remembered having read about a tunneling service provided by Cloudflare. Since my domain wolfgang-ziegler.com was already hosted on Cloudflare, this really was the easiest way to go.
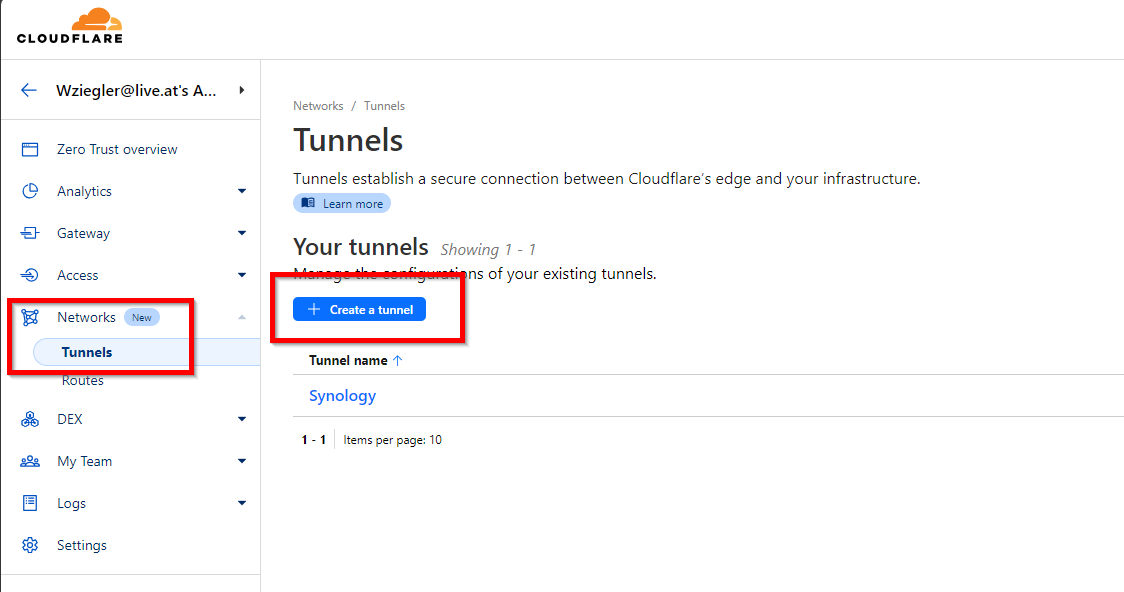
You only have to know about CloudFlare One, where you can simply configure such a tunnel for an existing domain.
Under Network - Tunnels you find the Create a tunnel option.
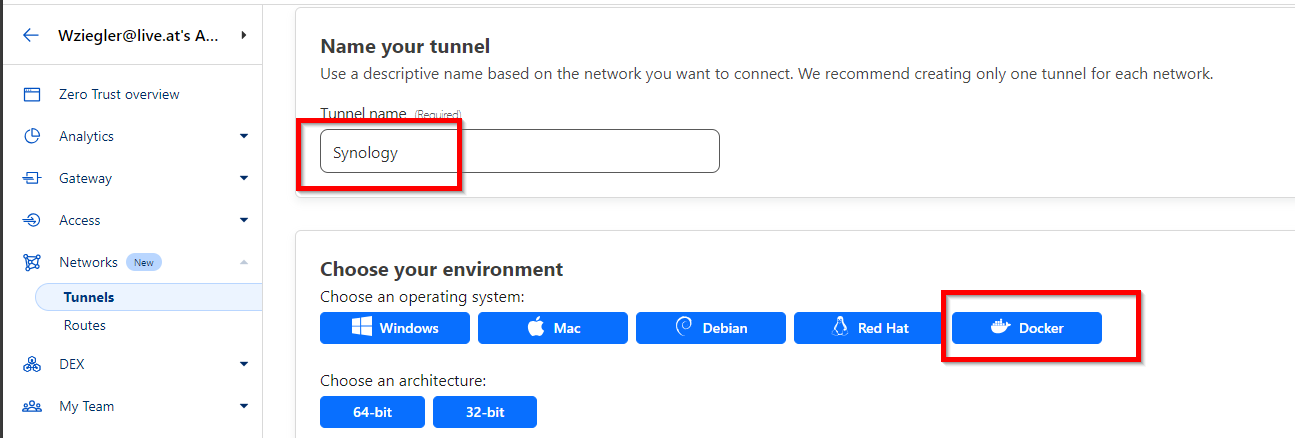
From there, it's just a matter of naming your new tunnel, installing the right connector (in my case this was yet another Docker container) and pointing the tunnel to your local service.
All set! As I initially said, this setup is running flawlessly now for more than 2 months. So at the moment I have no intention of changing that and it actually feels nice having my personal website and blog running on my own premises. Also, it's making good use of the hardware I have running anyway.