The Atari 2600 Video Mod
December 21, 2023Believe it or not, I just started an online programming course, called Atari 2600 Programming with 6502 Assembly.
Yes: assembly programming and yes again: for an Atari 2600. "Why?" you ask ... well, because it's fun 😆.
Anyway, starting this programming course reminded me that I had bought an Atari 2600 Junior (that's the smaller one, with the rainbow stripe) quite some time ago and that I had planned to apply the Composite Video Mod to this device.
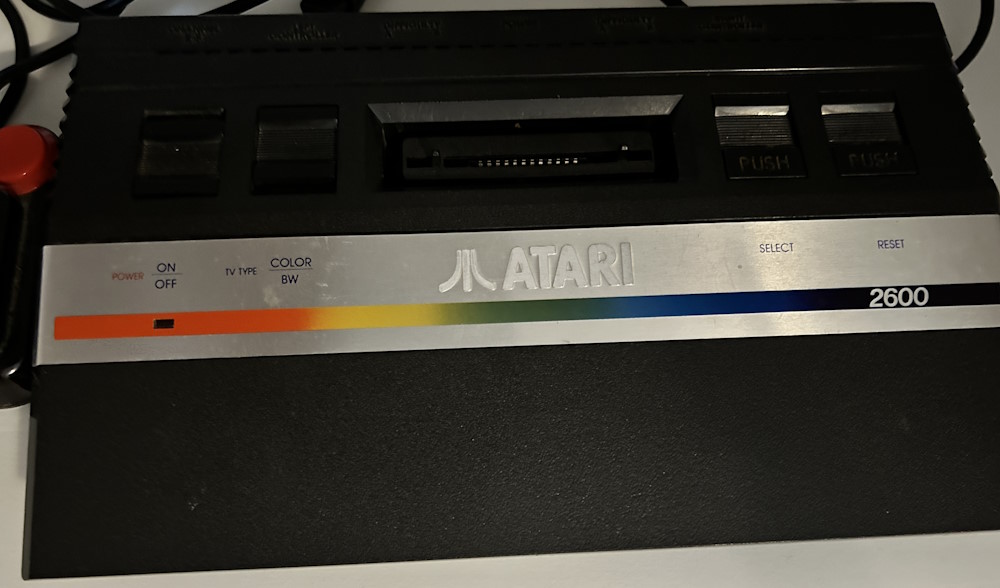
The Atari Composite Video Mod is a hardware modification that replaces the Atari's RF video output with composite video. This way, you don't need an antenna cable any more and can connect easier to most TVs and screens (at least via an adapter). Also the signal is usually better.
This video mod is mode is actually easy to build as it only requires 2 resistors and and transistor. However, you also need 3 RCA (cinch) connectors which I did not have and would have had to order anyway. So I decided to order the full mod kit. I found e.g. this offering for around 15€.
Following steps are required to apply this mod kit to the Atari 2600 Junior.
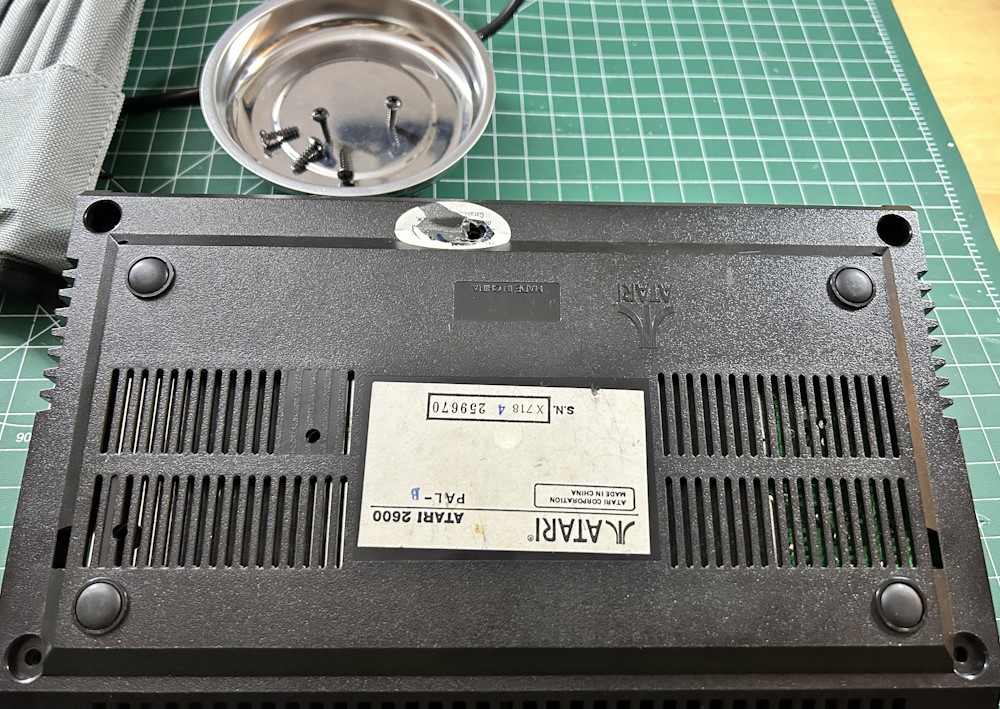
Opening the Case
The case is held together by 5 screws. The middle screw is "hidden" under the warranty seal. Well, we are going to void this warranty now big time.
When pulling the case apart be careful with the tiny plastic clamps that hold it together in the front. They break off easily (ask me how I know). But then, you don't really need those anyway.
Also, there's a ribbon cable from to top part of the box connected to the board, which you can just gently pull out.
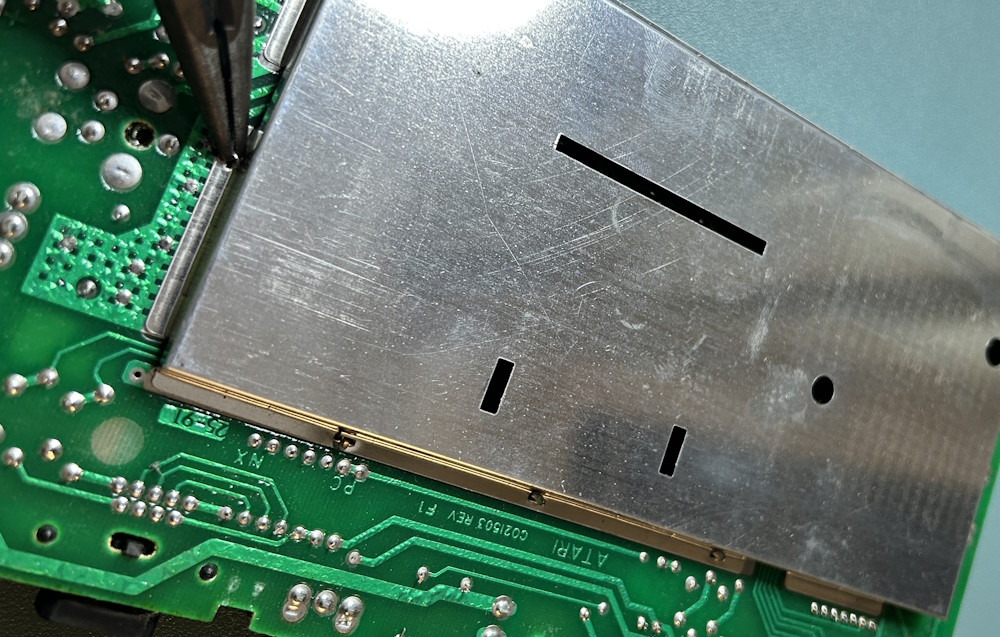
Removing the RF Shielding
As a first step, we must RF the Atari's RF shielding - that's the big silver case.
It's held together by small metallic clamps which you can just twist with a pair of pliers.
Then, the metallic boxes on the top and the bottom of the board come off easily.
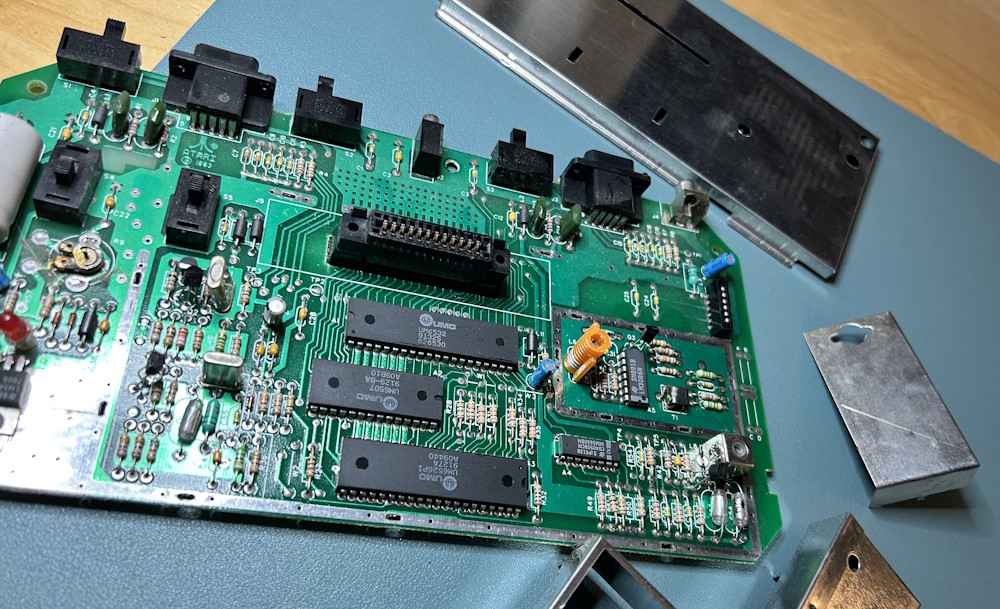
You can throw away this boxes as their purpose is RF shielding. Since we are replacing RF by composite video, they no longer have a purpose.
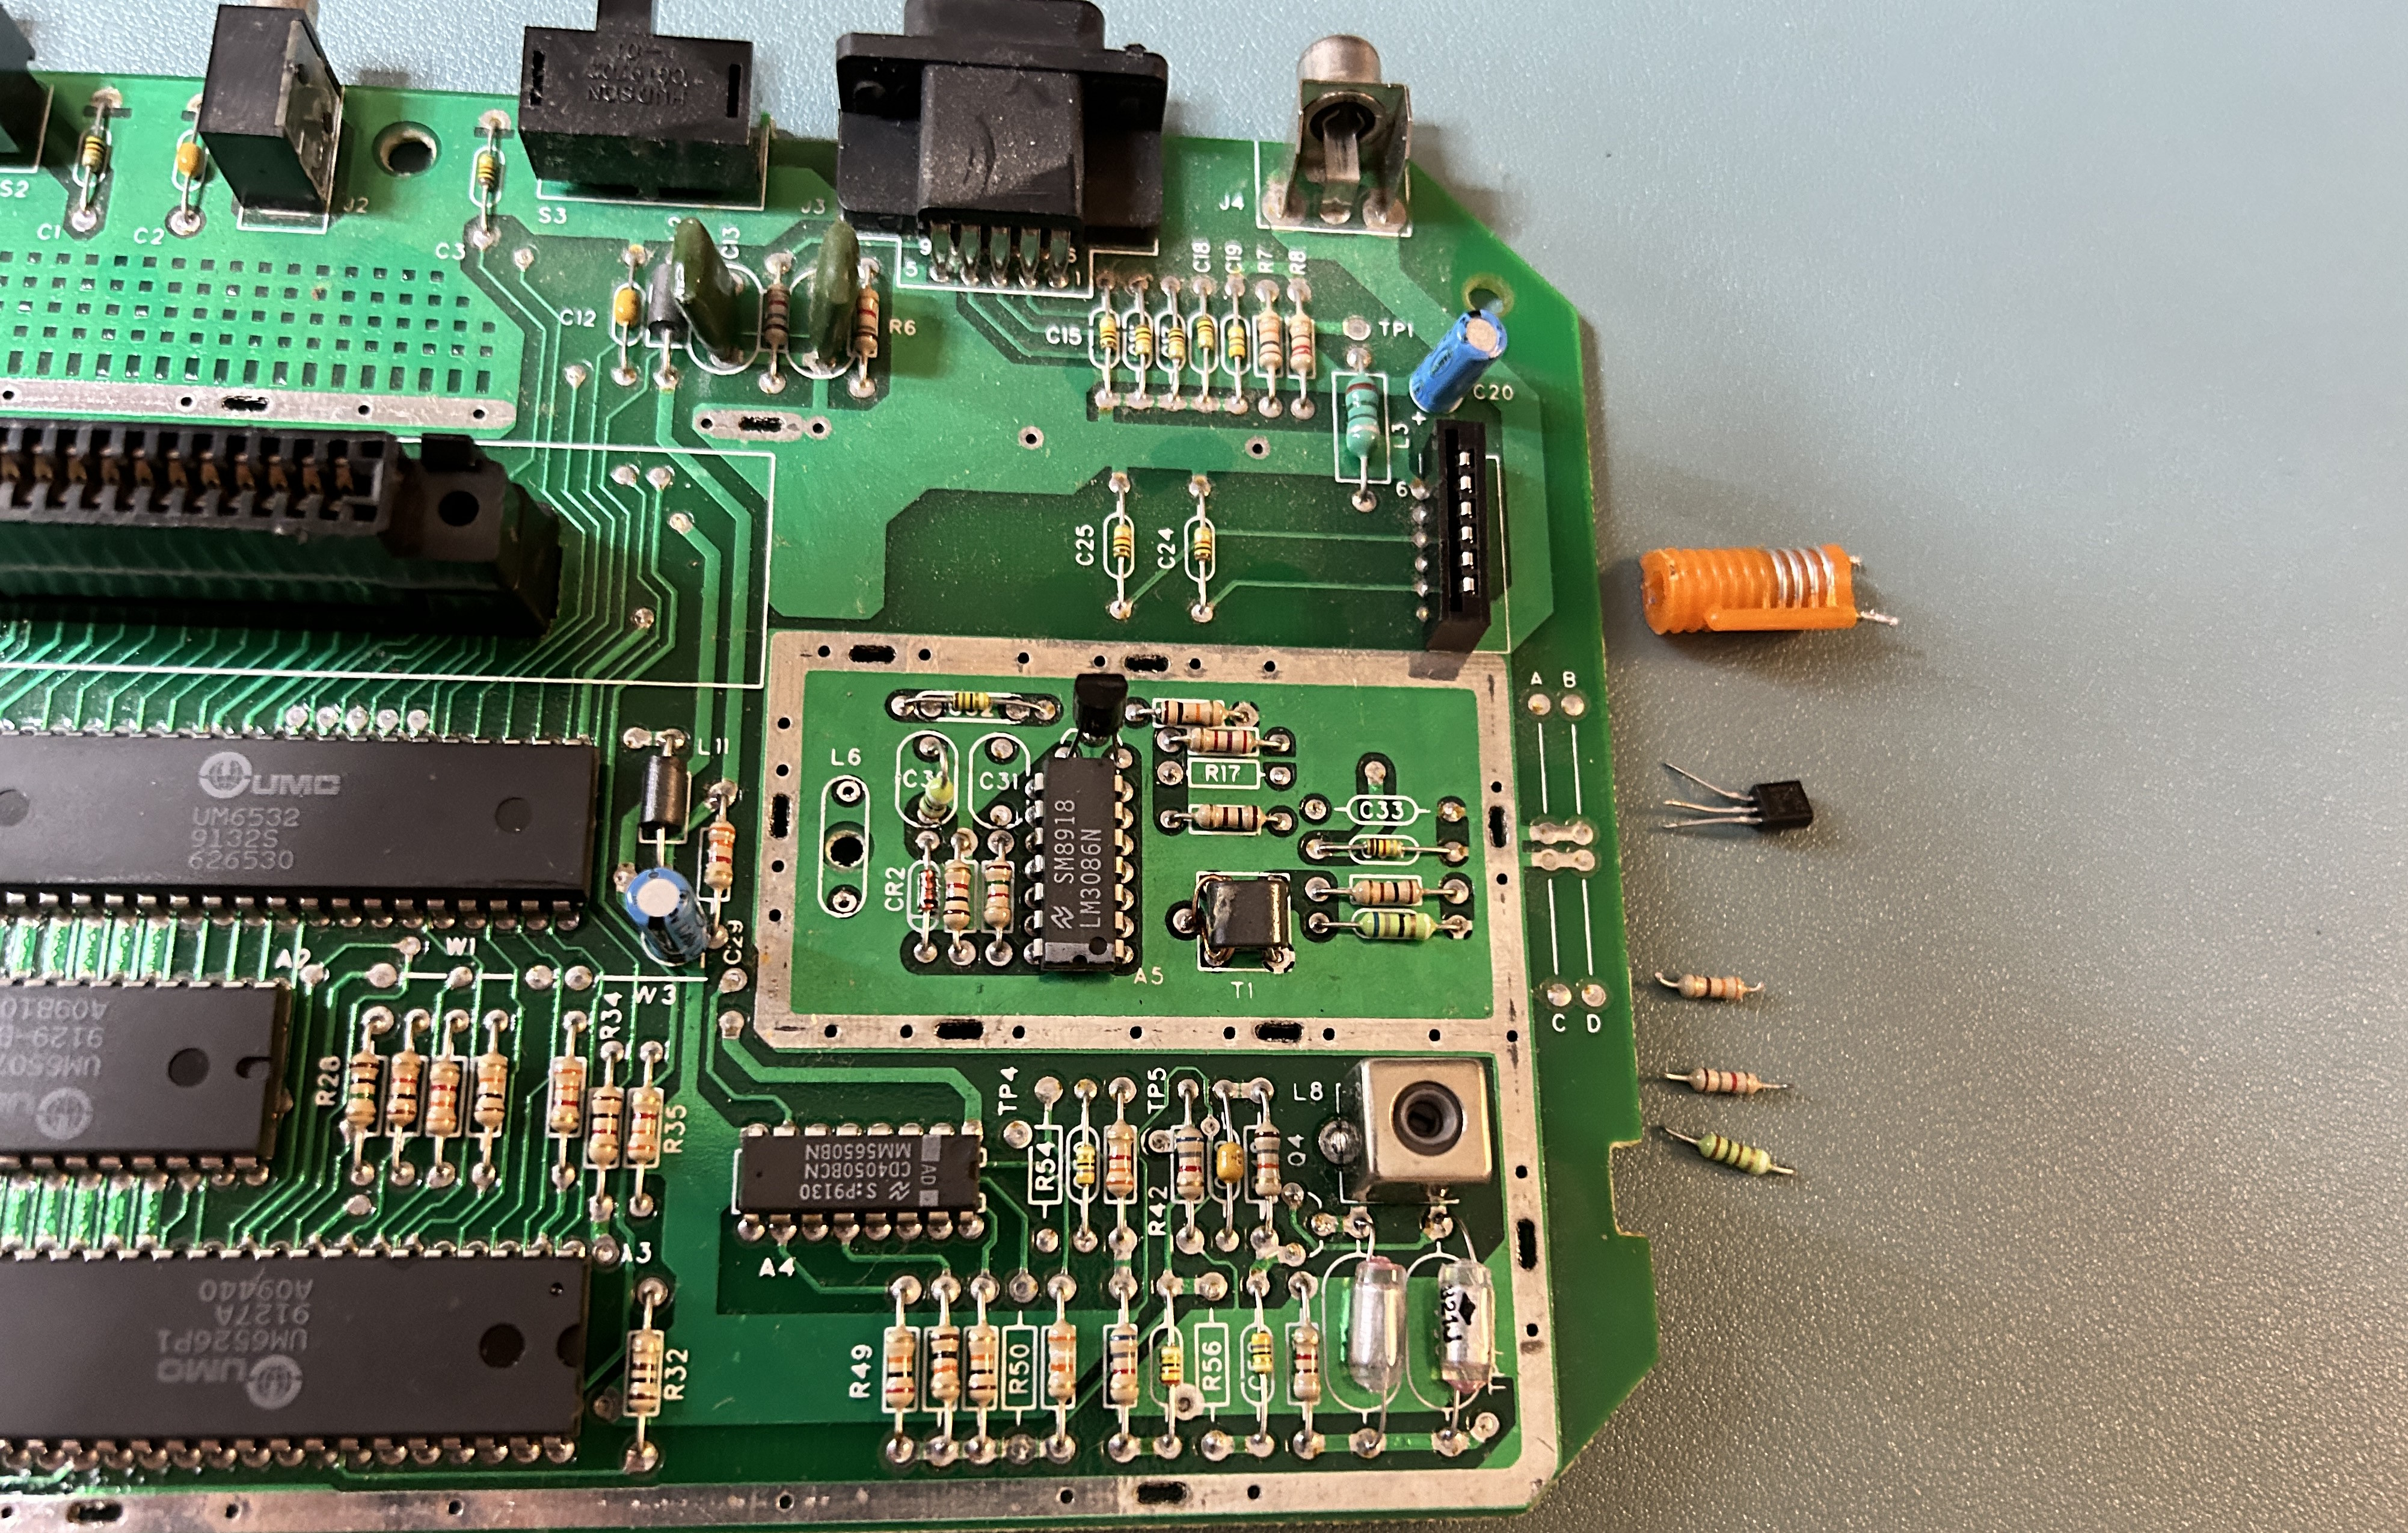
Removing Components
Now comes the slightly scary (😱) part - we need to remove a couple of electronic components from the board.
These components are:
- 2 resistors: R56, C33.
- The capacitor Q4.
- The orange plastic cylinder L6.
Before:

After:
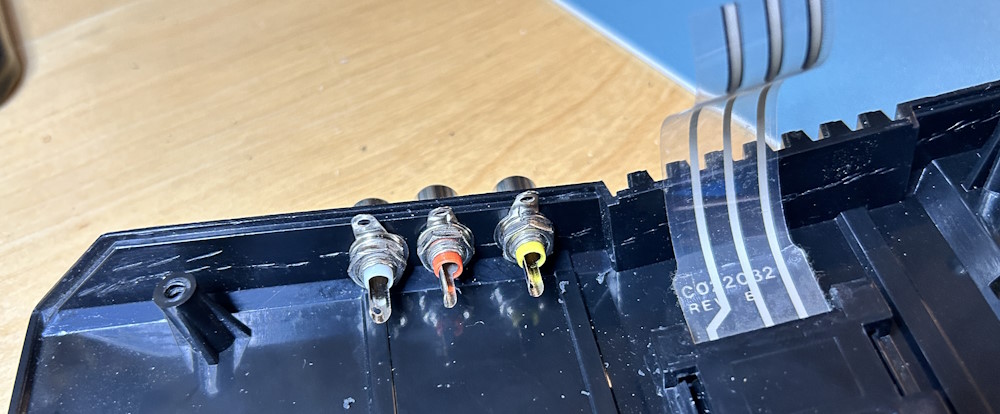
Installing the RFA Connectors
Alright, time to do some more damage (I said we'll void the warranty, didn't I?) - we will drill some holes into the top part of case to fit the RFA (cinch) connectors.
I used a regular power drill to create the holes for the RFA connectors and screwed them in.
Connecting the RCA Module
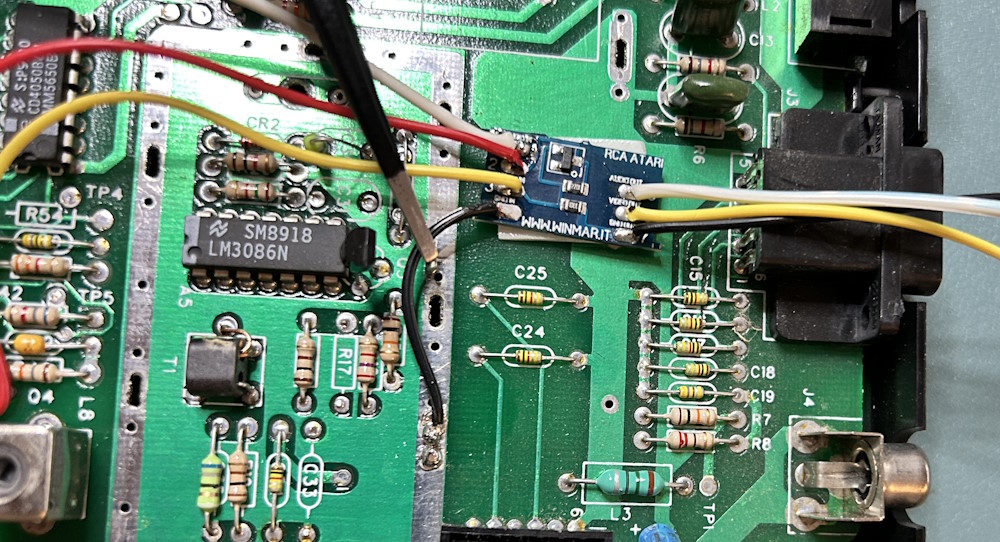
Finally it is time to bring the RCA module into the game.
First I soldered some wires to the RCA board, then I stuck the RCA board the main board simply using double-sided tape.

Input:
| Pin | Color |
|---|---|
| Audio | white |
| VIN | red |
| Video | yellow |
| GND | black |
Video (yellow) gets soldered to R65, where we had removed the resistor previously.
VIN (red) gets soldered to where the middle pin of the removed capacitor Q4 had been.
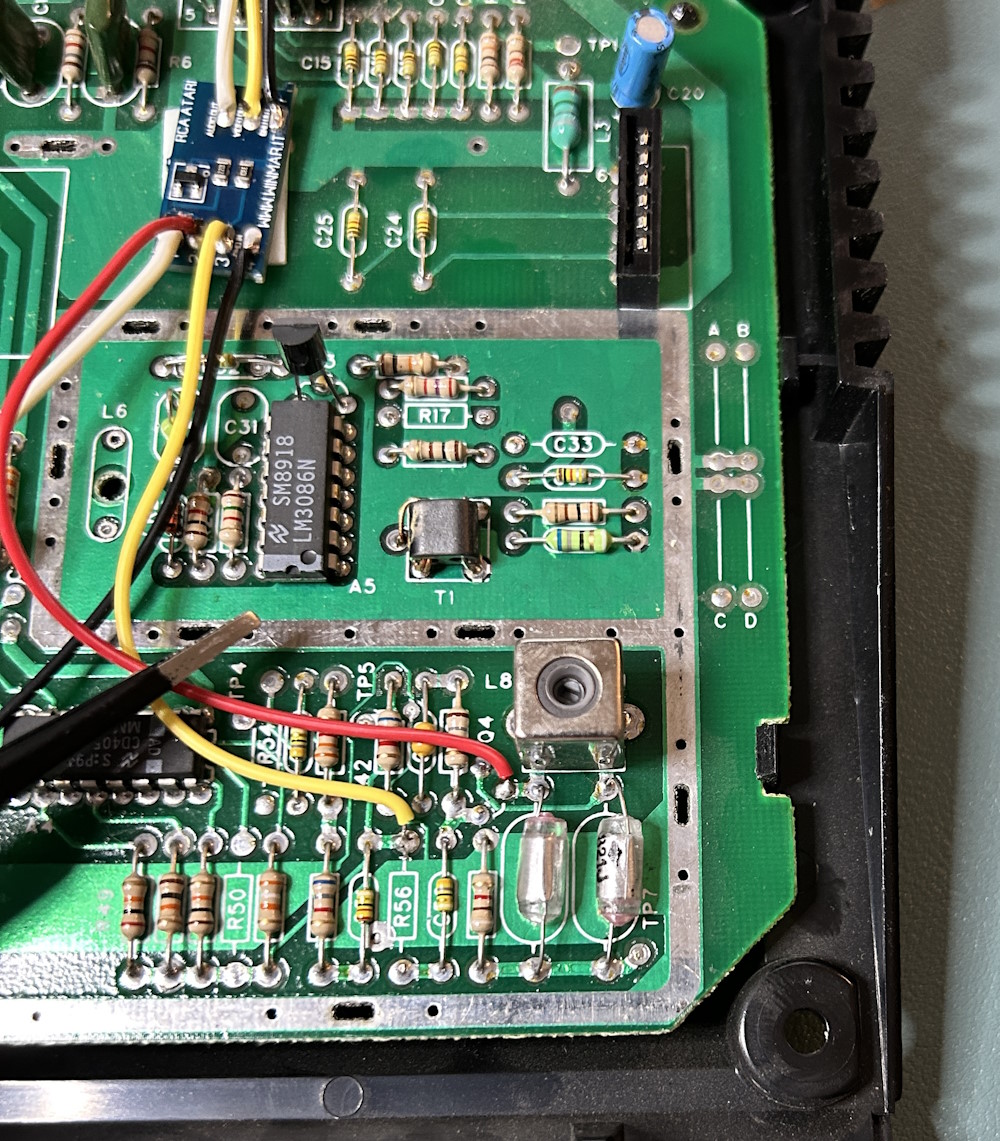
Audio (white) gets soldered to a location labelled A3.
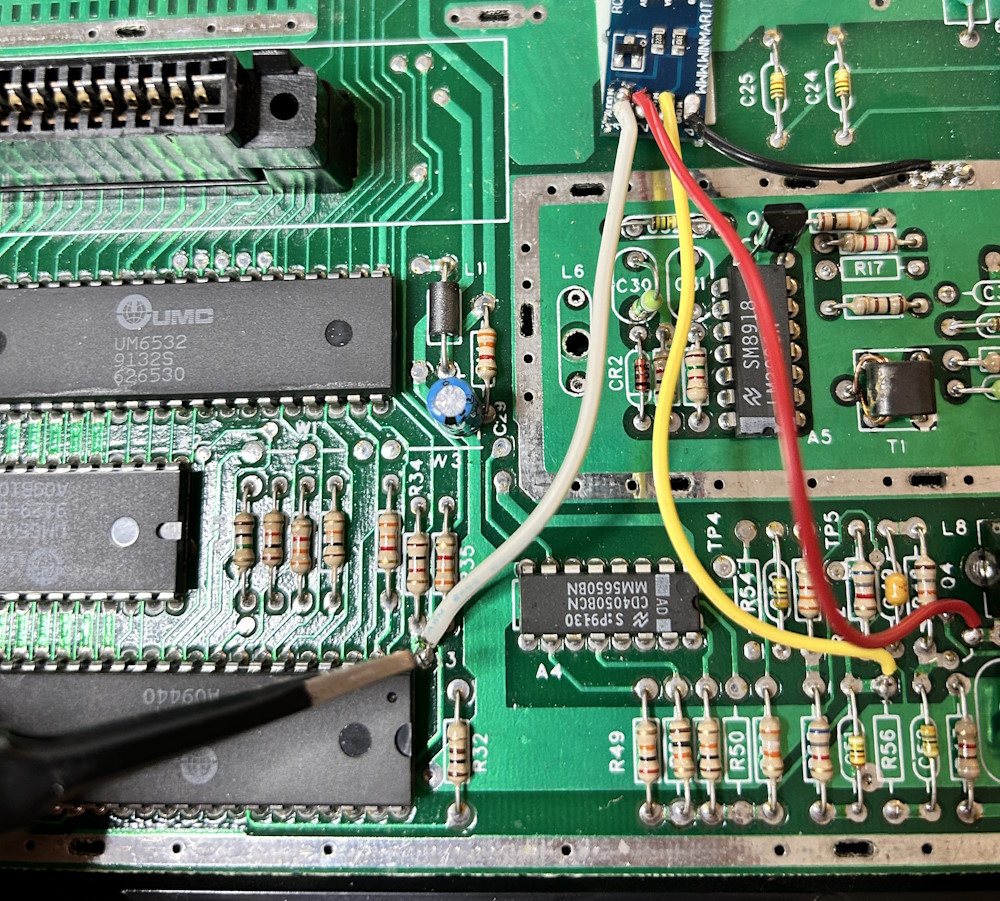
Ground (black) can just be soldered to the board like this.
Output:
| Pin | Color |
|---|---|
| Audio | white |
| Video | yellow |
| GND | black |
Now, the output pins get directly connected to the RCAs.

Ground (black) connects to all 3 RCAs. Video (yellow) connects to the yellow connector and Audio (white) connects to both the red and the yellow connector.
Make sure to leave the wires long enough so that you could easily open the case again later, without putting any strain on those wires.
Closing it Back Up
Guess what, that was it. We are done! Let's close the the case back up and give it a try.
And there it is: Pitfall on a portable monitor, connected via composite video to SCART to HDMI. Something I was not able to do before.
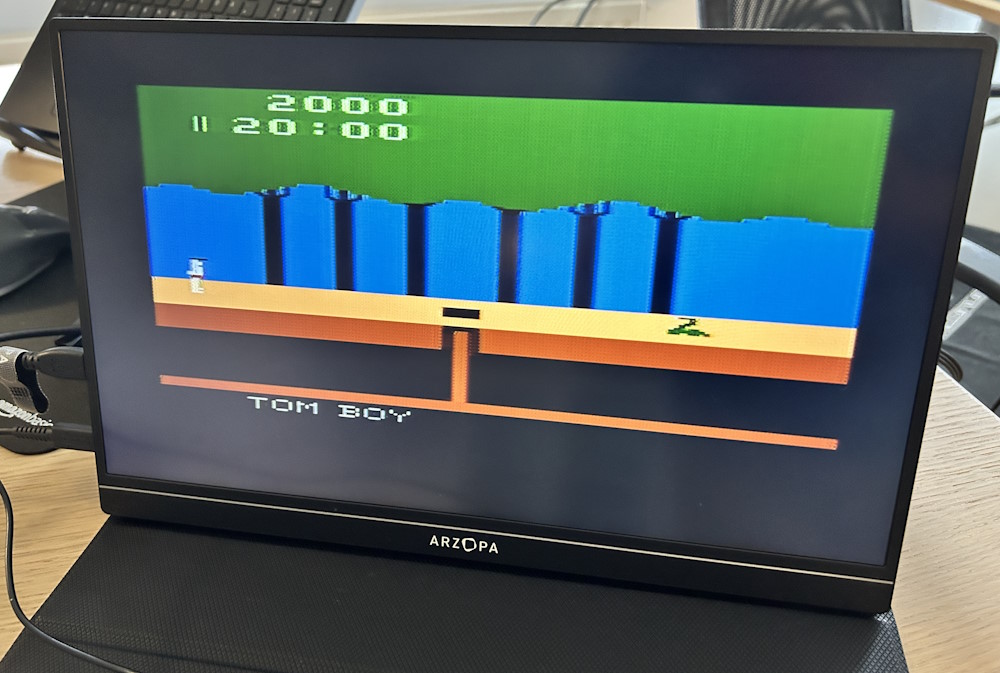
Also, isn't it hilarious that the German version of Pitfall is called "Dschungel Boy" 🤣.

What's Next?
The real challenge still awaits. I have another Atari 2600 that's in real(!) bad shape: Broken off switches, rust on the board and no video signal.
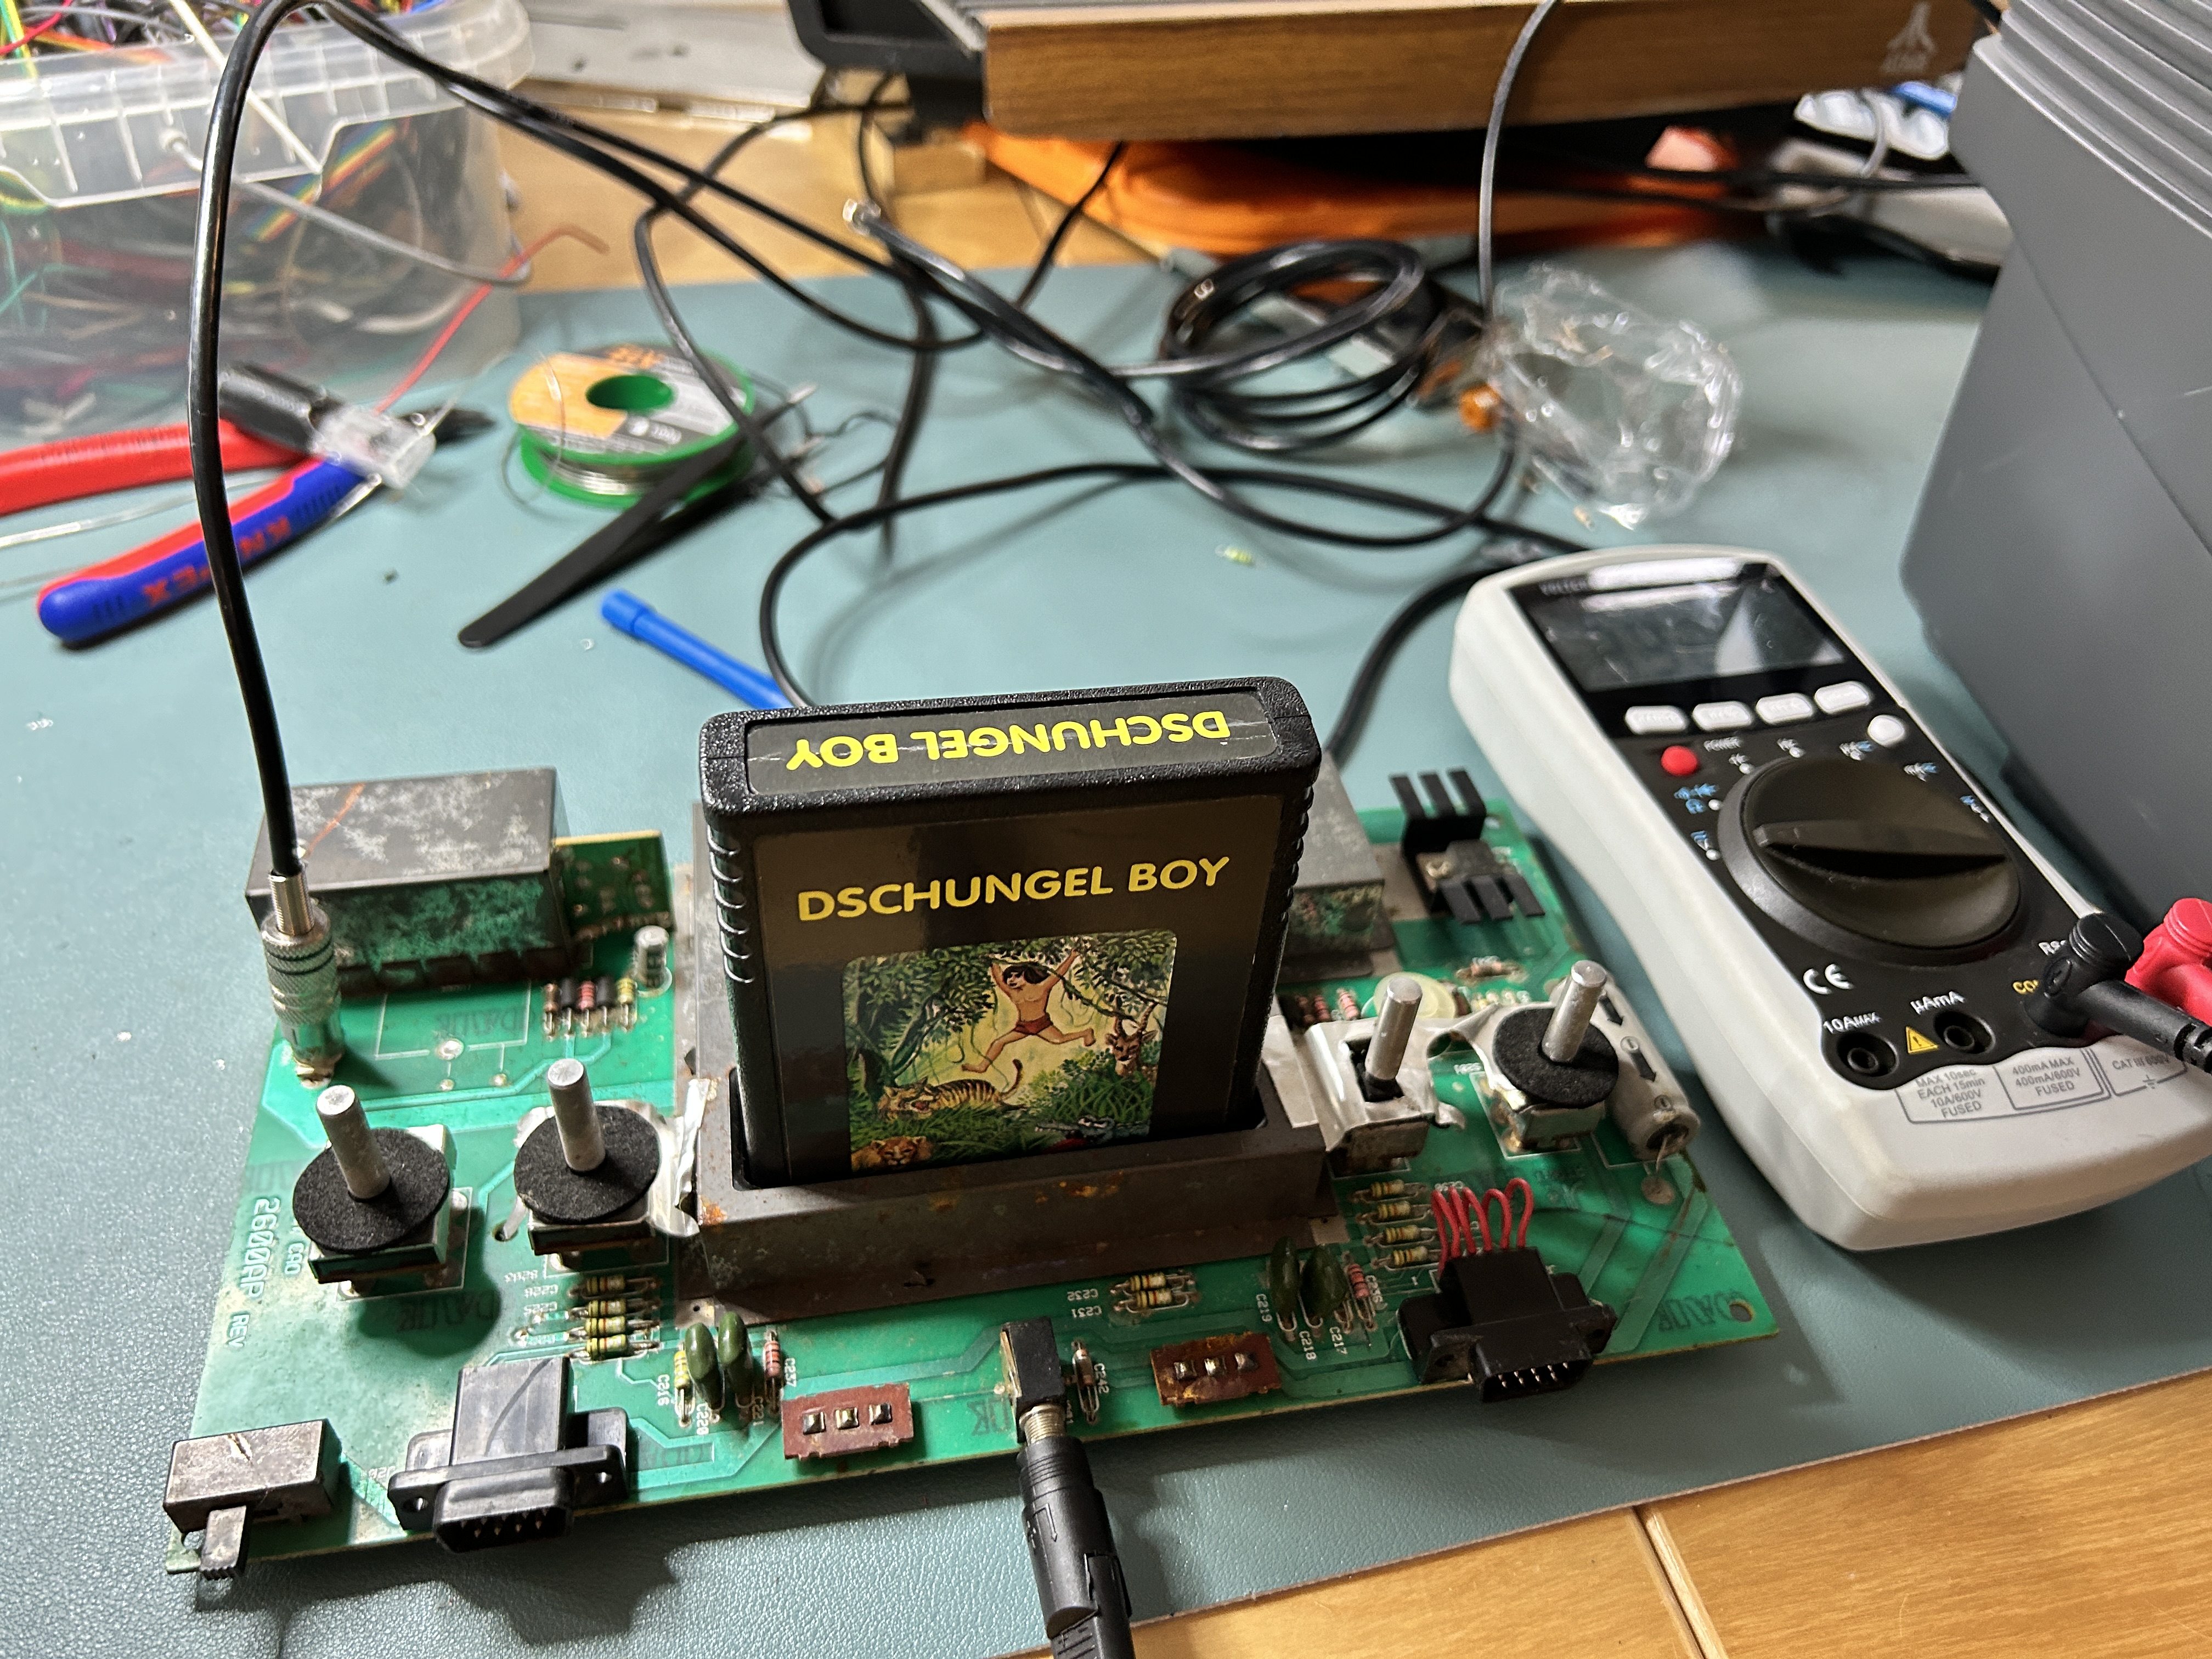
I'm trying to get this device back working again. Since the RF module is apparently broken, the video mod will be one of the first steps for this one too.
I'll keep you posted ...